Claude Code Hooks: The Complete Guide to Automating Your Workflow

Claude Code hooks let you run custom scripts before and after tool calls. This guide covers setup, real examples, and practical patterns for pre-commit, notifications, and more.
Claude Code hooks let you run shell commands automatically in response to events — before a tool executes, after it completes, or when a session starts. They are the difference between manually running linters after every edit and having it happen without thinking.
Most developers discover hooks after weeks of repeating the same post-edit routine. Run tests. Format code. Check types. Hooks eliminate that repetition by wiring your existing scripts directly into Claude Code's execution cycle.
This guide covers how hooks work, how to configure them, and the patterns that actually save time in practice.
How Hooks Work
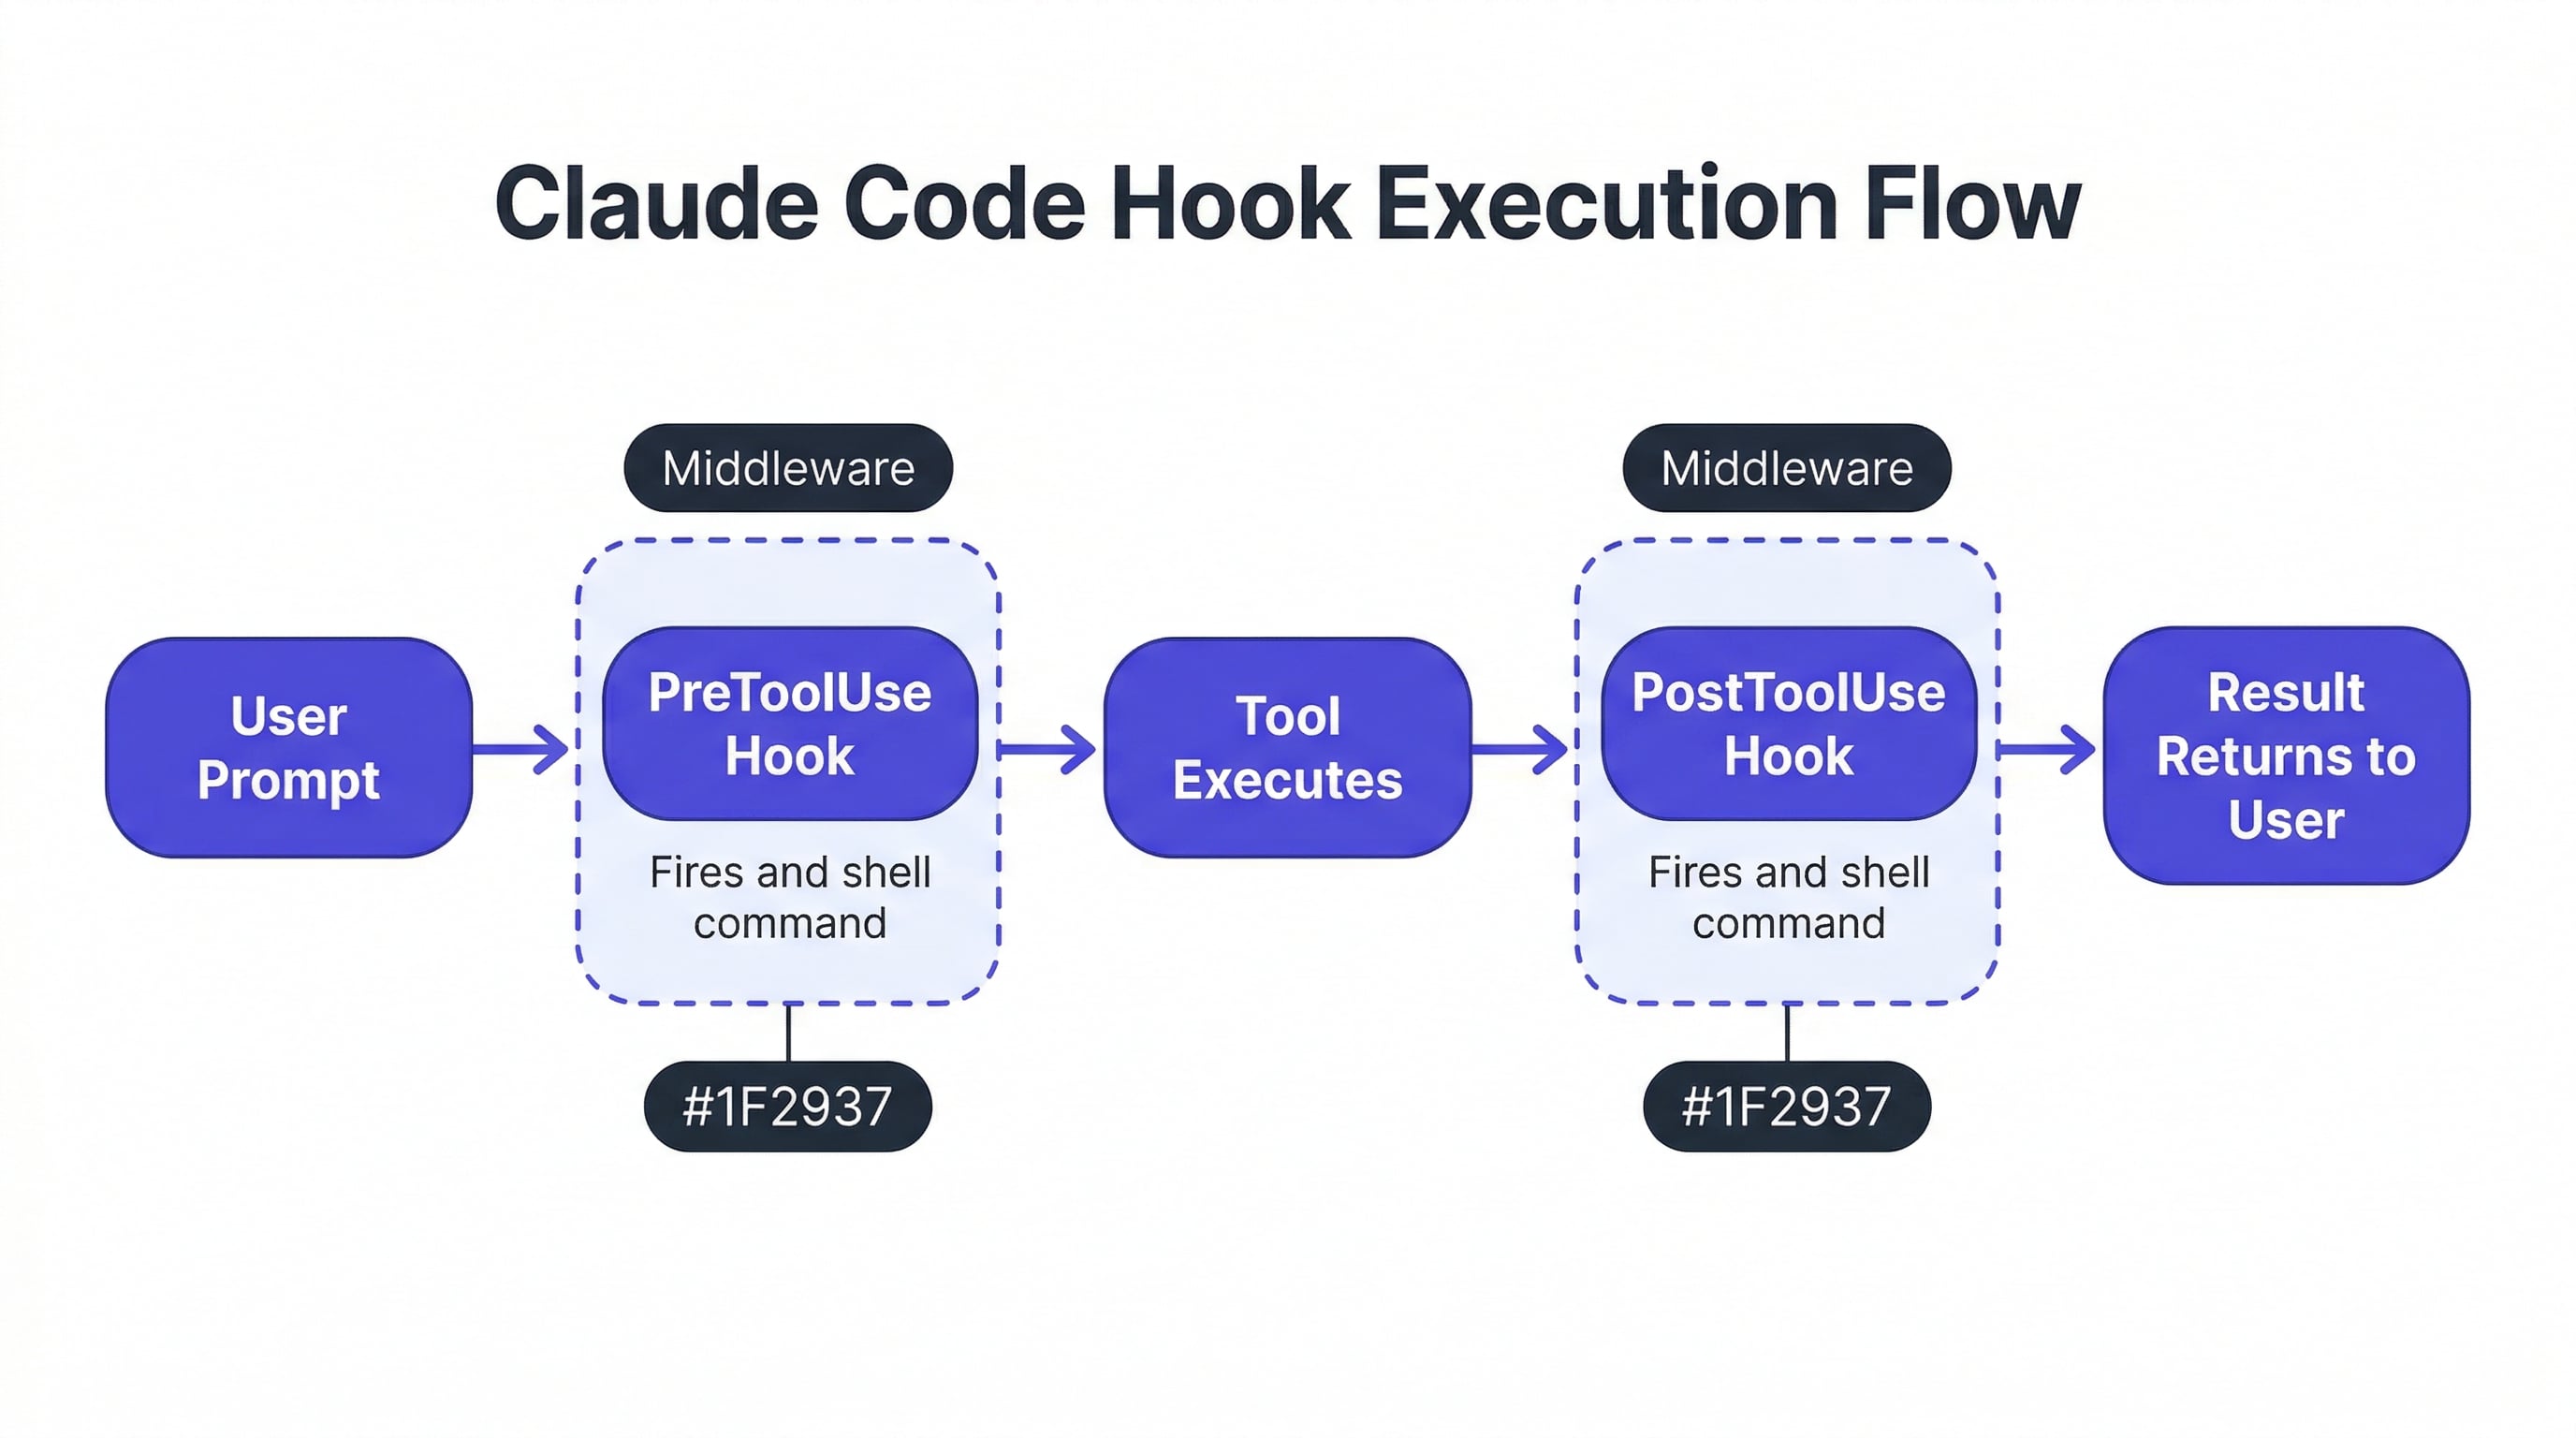
Hooks are shell commands defined in your settings.json that execute at specific points in Claude Code's workflow. There are four hook types:
- PreToolUse — runs before a tool call executes. Can block the call if the script exits with a non-zero code.
- PostToolUse — runs after a tool call completes. Useful for validation, formatting, or notifications.
- Notification — runs when Claude Code produces a notification event.
- Stop — runs when the agent finishes its turn and is about to return control to you.
Each hook receives context about the event as environment variables: the tool name, file paths involved, and the working directory. Your script reads these variables and does whatever it needs to do.
Setting Up Your First Hook
Hooks live in .claude/settings.json at your project root or in your global settings at ~/.claude/settings.json. The structure looks like this:
{
  "hooks": {
    "PostToolUse": [
      {
        "matcher": "Write|Edit",
        "command": "npx prettier --write $CLAUDE_FILE_PATH"
      }
    ]
  }
}
This hook runs Prettier on any file Claude Code writes or edits. The matcher field is a regex that filters which tool calls trigger the hook. $CLAUDE_FILE_PATH is an environment variable Claude Code sets before running your command.
To test it, create the settings file and make any edit through Claude Code. You should see the file get formatted automatically after the edit completes.
Practical Hook Patterns
Auto-Format on Every Edit
The most common hook. Runs your formatter after every file change:
{
  "hooks": {
    "PostToolUse": [
      {
        "matcher": "Write|Edit",
        "command": "npx prettier --write $CLAUDE_FILE_PATH 2>/dev/null || true"
      }
    ]
  }
}
The || true prevents formatting errors from blocking Claude Code's workflow. You want formatting to be best-effort, not a hard gate.
Type-Check Before Committing
Run TypeScript checks before Claude Code creates a git commit:
{
  "hooks": {
    "PreToolUse": [
      {
        "matcher": "Bash",
        "command": "if echo $CLAUDE_BASH_COMMAND | grep -q 'git commit'; then npx tsc --noEmit; fi"
      }
    ]
  }
}
If the type check fails (non-zero exit), the commit is blocked. Claude Code sees the error output and can fix the issues before retrying.
Run Tests After Multi-File Changes
Trigger your test suite after Claude Code finishes a batch of changes:
{
  "hooks": {
    "Stop": [
      {
        "command": "npm test -- --run 2>&1 | tail -20"
      }
    ]
  }
}
The Stop hook fires when Claude Code finishes its turn, making it the right place for integration-level checks.
Lint Only Changed Files
Instead of linting the entire project, lint only what Claude Code touched:
{
  "hooks": {
    "PostToolUse": [
      {
        "matcher": "Write|Edit",
        "command": "npx eslint $CLAUDE_FILE_PATH --fix 2>/dev/null || true"
      }
    ]
  }
}
This keeps the feedback loop fast even in large codebases.
PreToolUse: Blocking Dangerous Operations
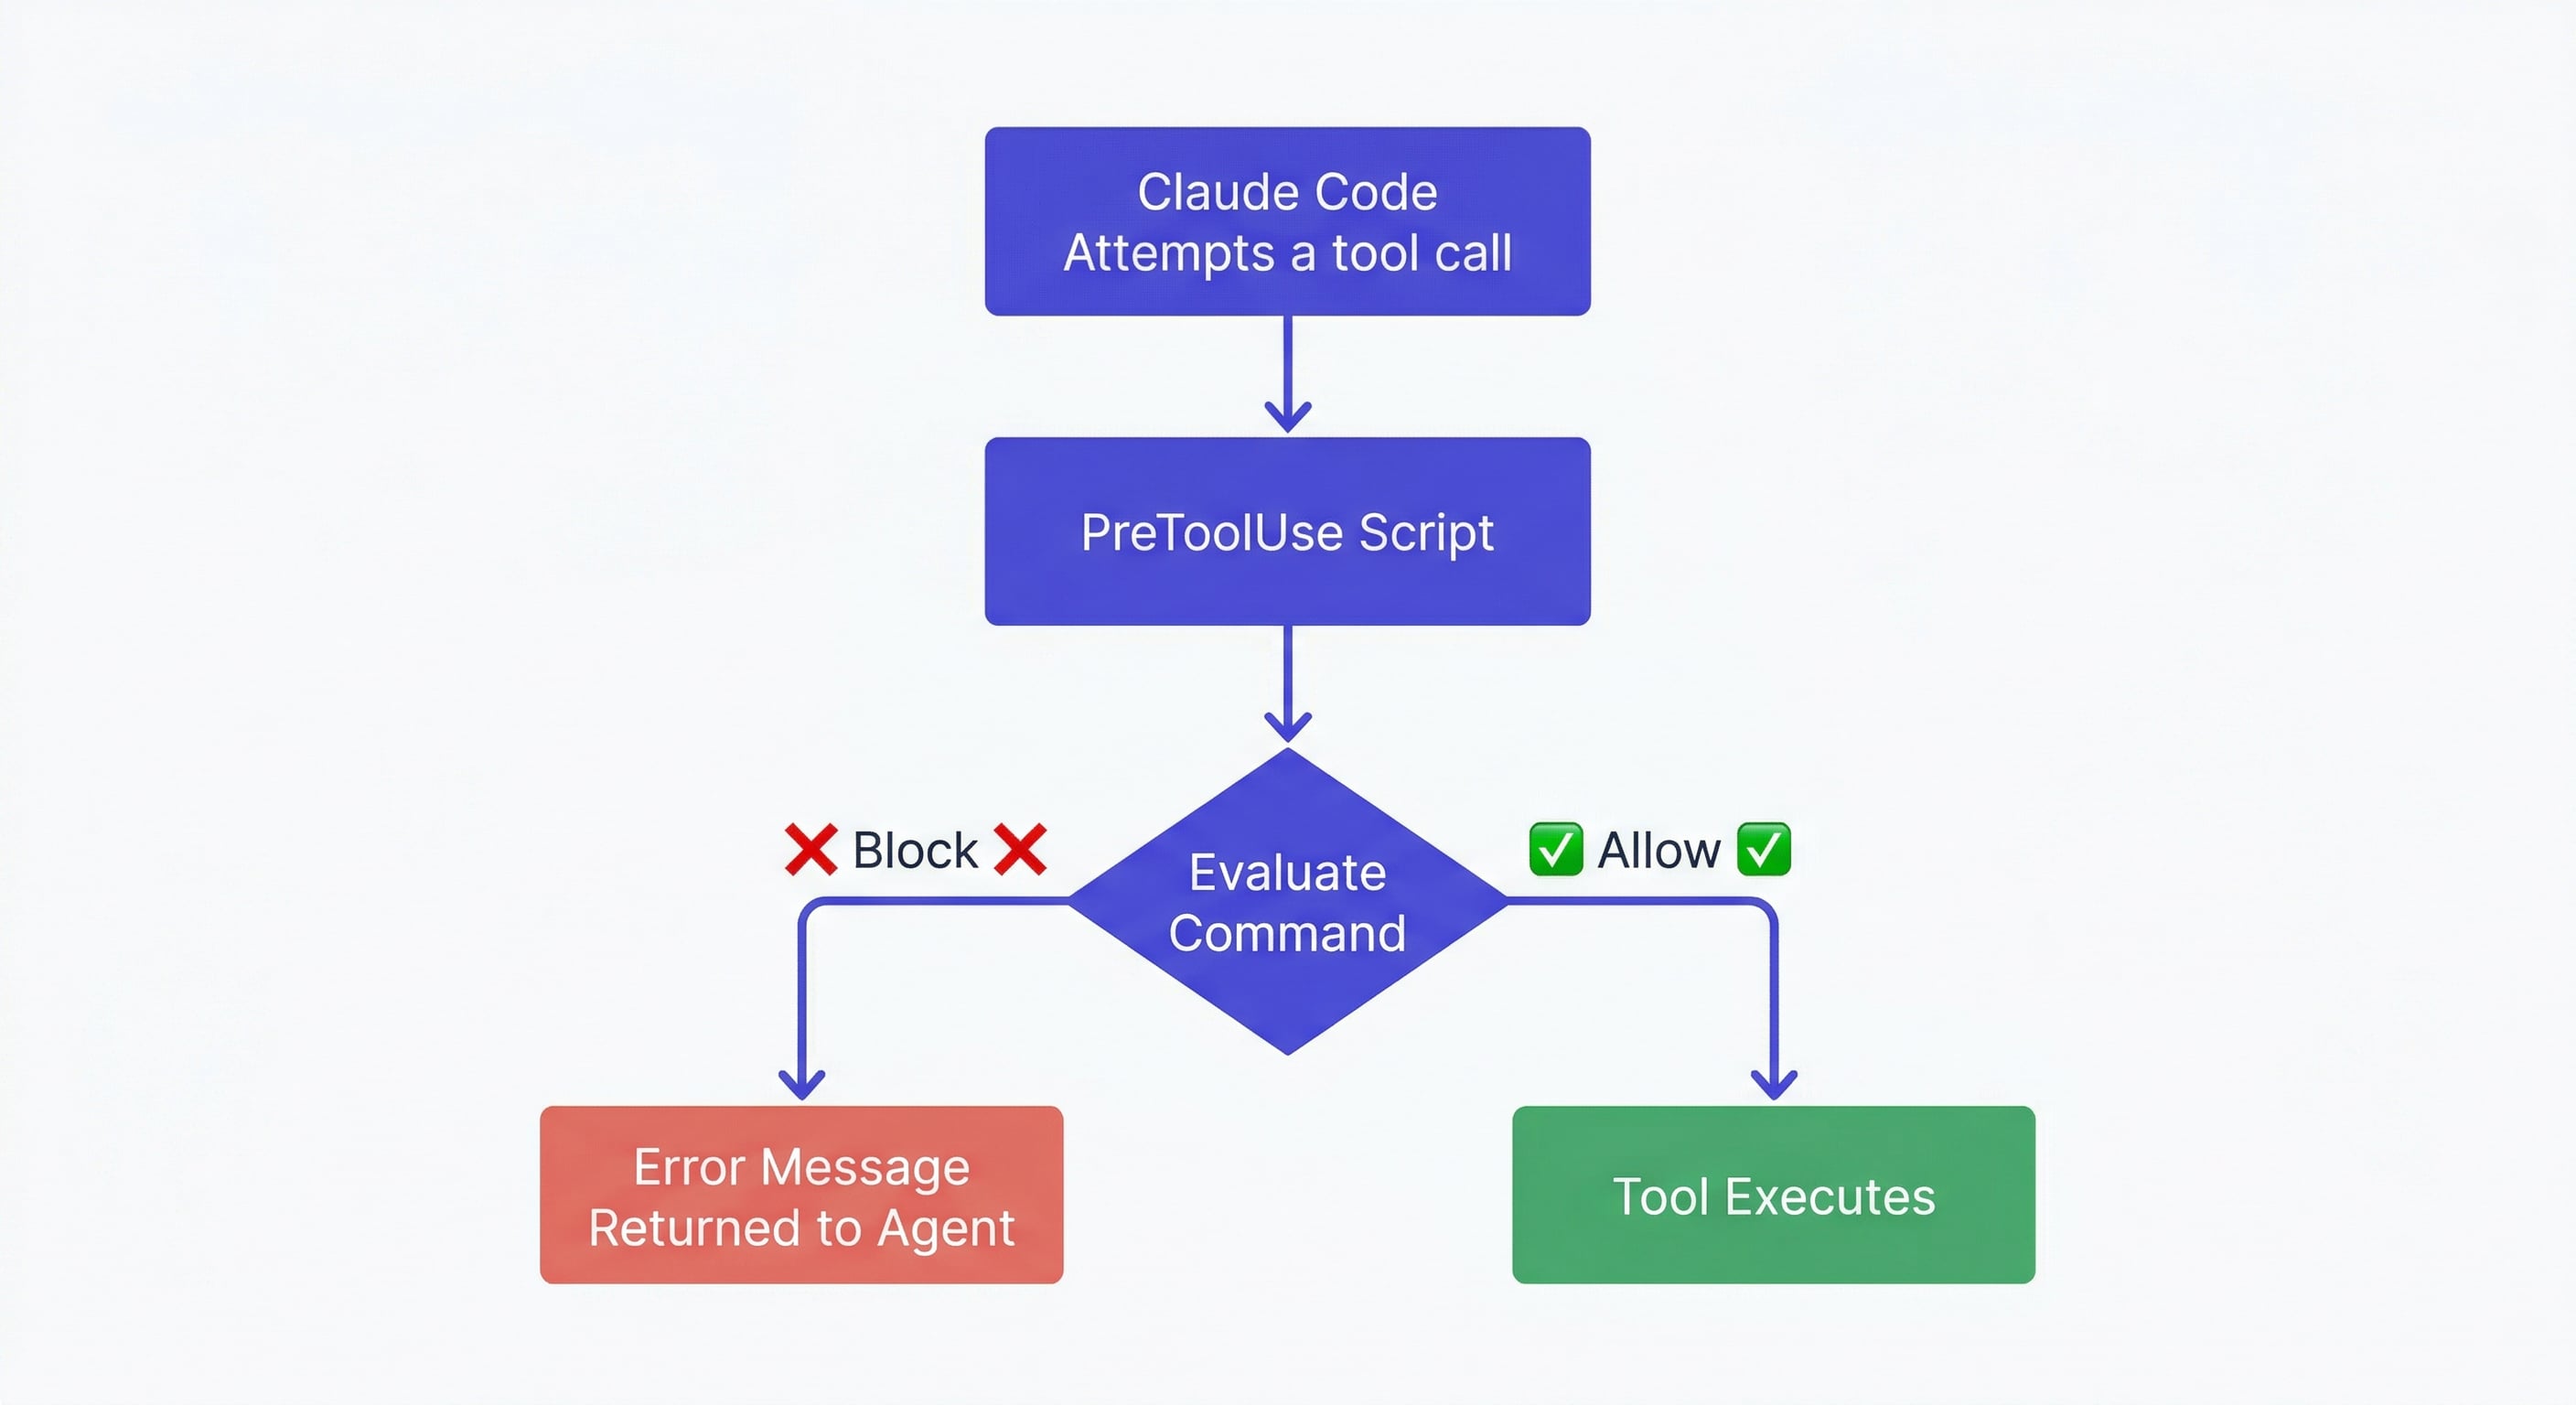
PreToolUse hooks are your safety net. They run before Claude Code executes a tool, and a non-zero exit code blocks the execution entirely.
Common safety patterns:
Prevent force pushes:
{
  "matcher": "Bash",
  "command": "if echo $CLAUDE_BASH_COMMAND | grep -q 'push.*--force'; then echo 'Force push blocked by hook' && exit 1; fi"
}
Block writes to protected files:
{
  "matcher": "Write|Edit",
  "command": "if echo $CLAUDE_FILE_PATH | grep -qE '\\.(env|pem|key)$'; then echo 'Cannot modify secrets files' && exit 1; fi"
}
Require confirmation for destructive git operations:
{
  "matcher": "Bash",
  "command": "if echo $CLAUDE_BASH_COMMAND | grep -qE 'git (reset --hard|clean -f|branch -D)'; then echo 'Destructive git operation blocked' && exit 1; fi"
}
These hooks act as guardrails. Claude Code sees the error message and adjusts its approach — it does not simply fail silently.
Hooks and Project Memory
Hooks handle the mechanical side of your workflow — formatting, linting, testing. But they do not solve the context problem. Your hooks configuration persists in settings.json, but the project knowledge Claude Code accumulates during a session does not.
This is where hooks and persistent memory complement each other. Hooks automate the repetitive tasks. A memory layer like MemClaw preserves the project context — architecture decisions, coding conventions, sprint goals — across sessions.
Together, they mean Claude Code starts every session knowing your project and automatically follows your quality standards. claude-code-best-practices
Debugging Hooks
When a hook does not fire or produces unexpected results:
-
Check the matcher regex. The matcher tests against the tool name, not the command.
WriteandEditare separate tools. UseWrite|Editto catch both. -
Test your command manually. Copy the command from settings.json, set the environment variables yourself, and run it in your terminal. Most hook failures are plain shell errors.
-
Check exit codes. PreToolUse hooks block on non-zero exits. If your hook accidentally returns non-zero (a grep with no match, for example), it blocks the tool call. Always add
|| trueto commands that should not block. -
Look at stderr. Hook stderr output appears in Claude Code's context. If your hook prints errors, Claude Code sees them and may react to them.
Advanced: Chaining Multiple Hooks
You can define multiple hooks for the same event. They execute in order:
{
  "hooks": {
    "PostToolUse": [
      {
        "matcher": "Write|Edit",
        "command": "npx prettier --write $CLAUDE_FILE_PATH 2>/dev/null || true"
      },
      {
        "matcher": "Write|Edit",
        "command": "npx eslint $CLAUDE_FILE_PATH --fix 2>/dev/null || true"
      }
    ]
  }
}
Format first, then lint. Order matters — Prettier and ESLint can conflict if run in the wrong sequence.
For complex workflows, consider writing a single shell script that handles all post-edit tasks and calling that from the hook instead of chaining multiple entries.
Getting Started
Start with one hook. The auto-format PostToolUse hook is the easiest win — it eliminates an entire category of manual work with zero risk.
Once you are comfortable with the pattern, add safety hooks (PreToolUse for blocking dangerous operations) and quality hooks (Stop for running tests).
Combine hooks with persistent project memory for the full workflow: Claude Code loads your project context automatically, follows your conventions, and your hooks enforce quality standards on every change.
Add persistent memory to your Claude Code workflow → memclaw.me
export FELO_API_KEY="your-api-key-here"
/plugin marketplace add Felo-Inc/memclaw
/plugin install memclaw@memclaw
claude-code-vs-cursor | claude-code-memory | claude-code-context-window