MemClaw Installation Guide: Setup in Under 2 Minutes

Install MemClaw on OpenClaw or Claude Code in under 2 minutes. Step-by-step setup guide with API key configuration and first workspace creation.
MemClaw installs as a skill on OpenClaw or Claude Code. There's no server to run, no database to configure, and no JSON files to edit. The whole setup — install, API key, first workspace — takes under two minutes.
This guide covers every installation method and walks through the first-run setup.
Before You Start
You need two things:
- OpenClaw or Claude Code already installed and working
- A Felo API key — get one free at felo.ai/settings/api-keys
That's it. No other dependencies.
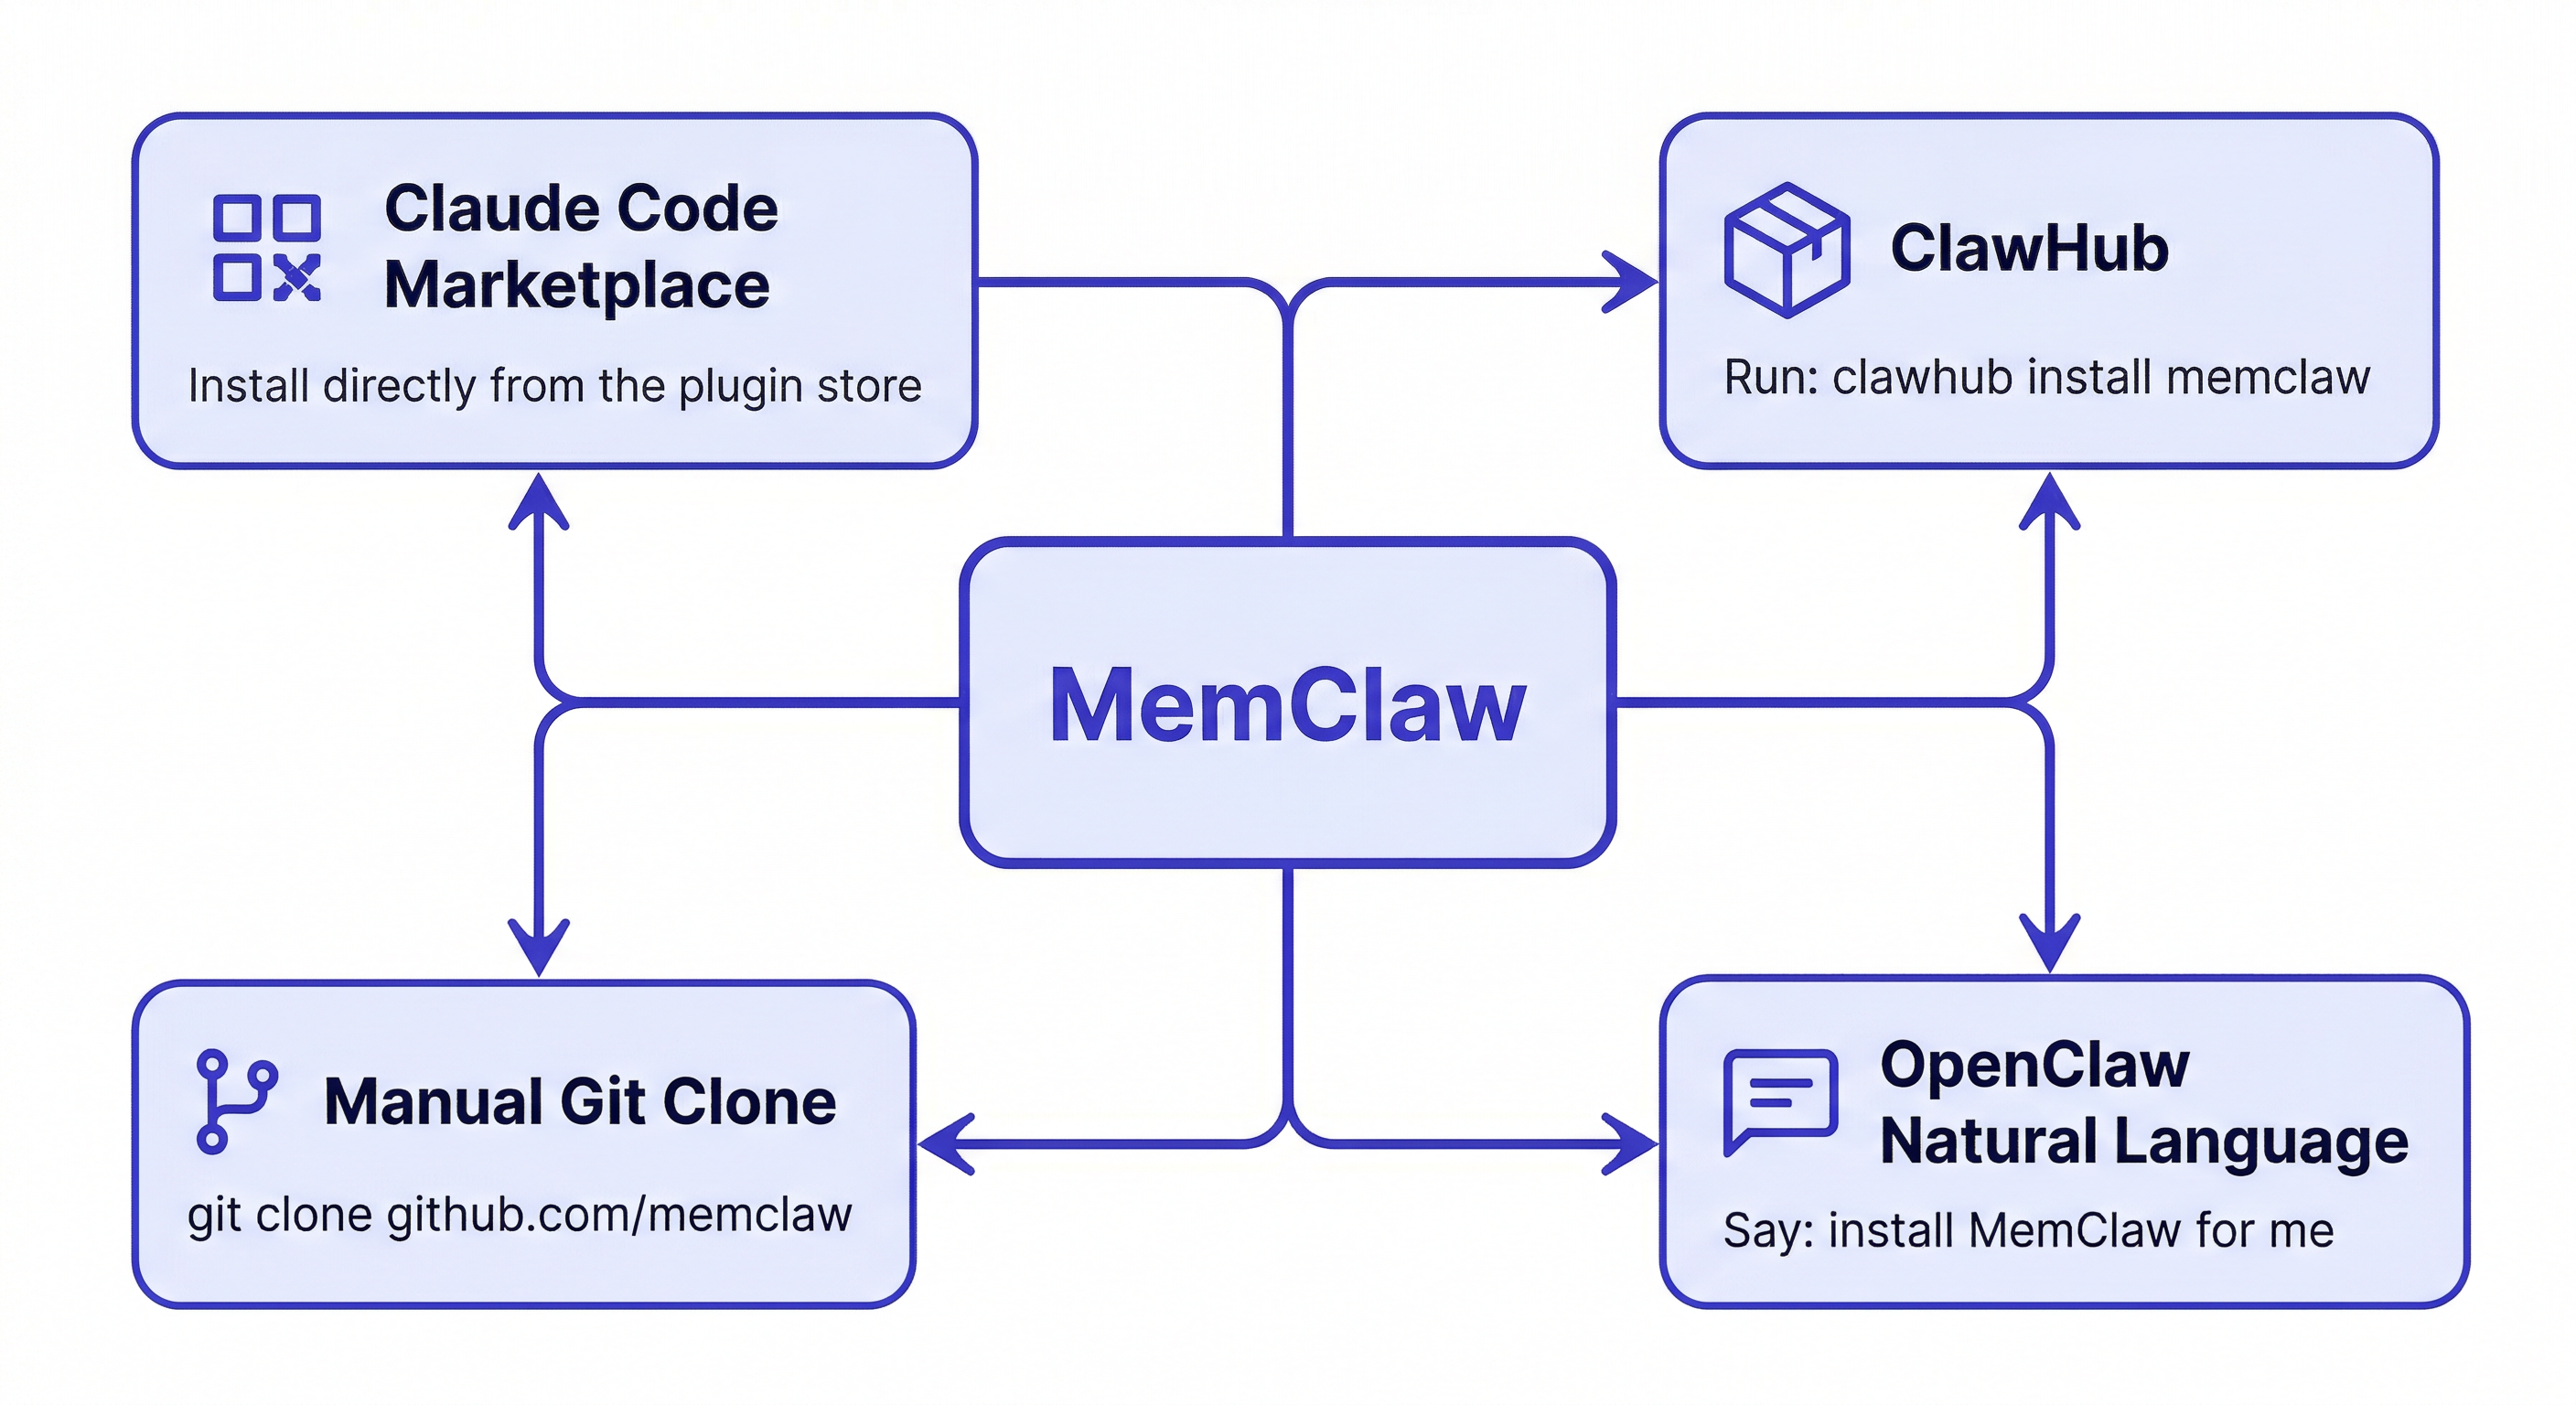
Method 1: Claude Code Plugin Marketplace (Recommended)
The fastest method if you're using Claude Code.
Open Claude Code and run:
/plugin marketplace add Felo-Inc/memclaw
/plugin install memclaw@memclaw
Claude Code handles the download and installation automatically. You'll see a confirmation when it's done.
Method 2: OpenClaw Natural Language
Tell OpenClaw to install it directly:
Please install https://github.com/Felo-Inc/memclaw and use MemClaw after installation.
OpenClaw fetches the repository and installs the skill. No terminal commands needed.
Method 3: OpenClaw Install Script
For OpenClaw users who prefer a direct install:
bash <(curl -s https://raw.githubusercontent.com/Felo-Inc/memclaw/main/scripts/openclaw-install.sh)
Method 4: Manual Installation
If you prefer to install manually or need to inspect the code first:
git clone https://github.com/Felo-Inc/memclaw.git
Then copy the skill to the appropriate directory:
For Claude Code:
cp -r memclaw/memclaw ~/.claude/skills/
For Gemini CLI:
cp -r memclaw/memclaw ~/.gemini/skills/
For Codex:
cp -r memclaw/memclaw ~/.codex/skills/
Setting Your API Key
After installation, set your Felo API key as an environment variable.
macOS / Linux:
export FELO_API_KEY="your-api-key-here"
To make it permanent, add it to your shell profile:
echo 'export FELO_API_KEY="your-api-key-here"' >> ~/.zshrc
source ~/.zshrc
Windows (PowerShell):
$env:FELO_API_KEY="your-api-key-here"
Get your key at felo.ai/settings/api-keys. The free tier is sufficient for most individual workflows.
Verify the Installation
Ask your agent to confirm MemClaw is working:
Is MemClaw installed?
Or try creating a test workspace:
Create a workspace called Test
If MemClaw is installed and the API key is set correctly, you'll see a confirmation that the workspace was created.
Creating Your First Workspace
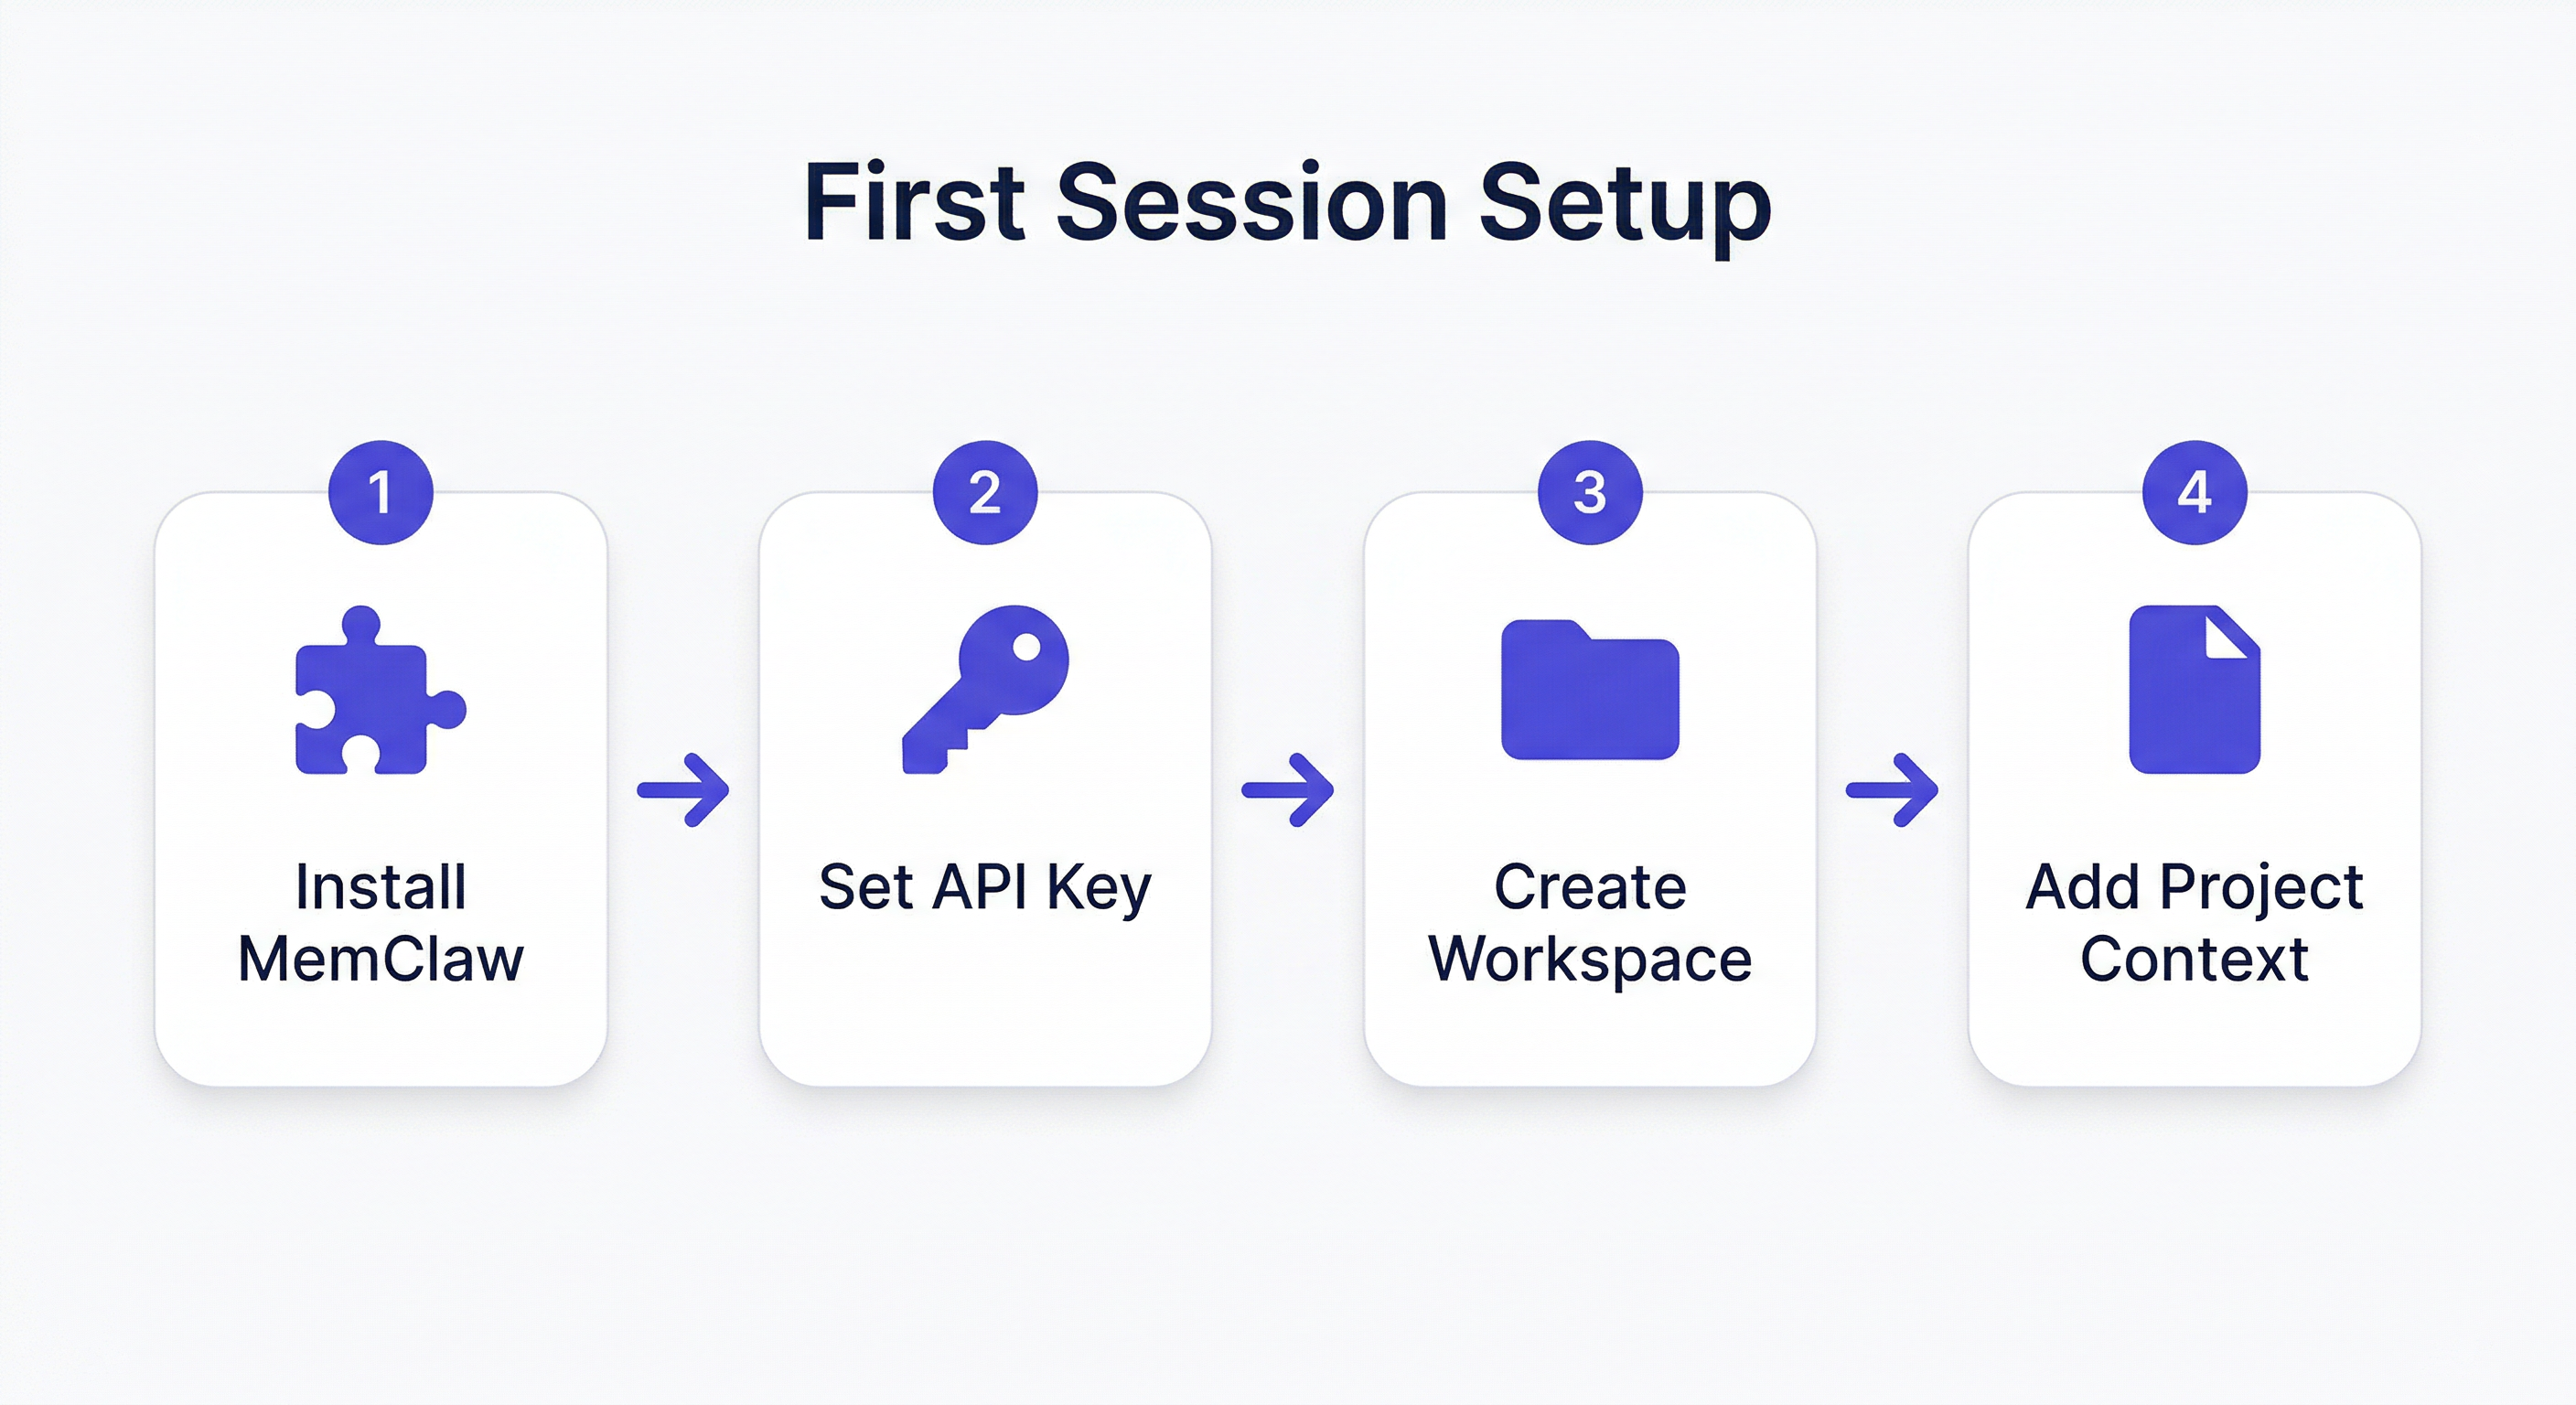
Once installed, create a workspace for each active project:
Create a workspace called [your project name]
Examples:
Create a workspace called Client Alpha
Create a workspace called My SaaS Project
Create a workspace called Job Search
Workspace names are case-insensitive and can contain spaces. Use whatever naming convention makes sense for your workflow.
First-Session Setup
After creating a workspace, add the foundational context the agent will need in every future session. This is a one-time setup per project.
Add project background:
Add to workspace: [describe the project — what it is, who it's for, key constraints]
Add any existing decisions:
Add decision: [decision + rationale]
Set current status:
Update workspace status: [where things stand right now]
You don't need to add everything at once. Start with the basics and let the workspace grow as you work.
How To Build A Knowledge Base With Openclaw
Loading a Workspace
At the start of each session, load the relevant workspace:
Load the [project name] workspace
The agent reads the workspace and is immediately oriented — project background, current status, logged decisions, saved artifacts. No re-briefing needed.
Installing on Multiple Agents
If you use both OpenClaw and Claude Code (or other agents), install MemClaw on each one. The same API key works across all agents, and they all share the same workspace data.
# Same key for all agents
export FELO_API_KEY="your-api-key-here"
A decision logged in an OpenClaw session is visible in Claude Code. Research saved in Claude Code is accessible in OpenClaw. One workspace, all agents in sync.
Cross-Agent Compatibility Guide
Setting Up Multiple Projects
Once MemClaw is installed, the recommended workflow is to create one workspace per active project immediately — not just when you need it.
Creating workspaces upfront costs nothing and takes seconds. Having them ready means you can start any project session instantly, without stopping to set up context first.
A typical setup for someone managing multiple projects:
Create a workspace called Client Alpha
Create a workspace called Client Beta
Create a workspace called Internal Dashboard
Create a workspace called Job Applications
Then add foundational context to each one:
Load the Client Alpha workspace
Add to workspace: Client Alpha is building a B2B invoicing SaaS.
Stack: Next.js, Node, Postgres. Contact: James ([email protected]).
Deadline: June 30. Budget: fixed.
Load the Client Beta workspace
Add to workspace: Client Beta needs a marketing site redesign.
Brand guidelines in Figma (link saved as artifact).
Sarah reviews all copy before publishing.
Spend 5 minutes on this upfront. Every future session starts instantly.
Your First Week With MemClaw
The workspace becomes genuinely useful as you build up context. Here's what to focus on in the first week:
Day 1: Create workspaces and add background context One workspace per project. Add project description, key contacts, tech stack, and any hard constraints. This is the foundation everything else builds on.
Days 2-3: Start logging decisions Every time you make a meaningful decision — architecture choice, scope decision, client preference — add it to the workspace with the rationale. Don't wait until you have a lot to log. One decision per session is enough to start.
Add decision: using Tailwind not custom CSS —
faster development, client doesn't need custom design system
Days 4-5: Save your first artifacts When the agent produces something useful — a spec, an analysis, a draft — save it before closing the session.
Save that requirements document to the workspace
End of week: Update status on each project A one-line status update per workspace. Where do things stand right now?
Update workspace status: auth done, working on dashboard
By the end of the first week, each workspace has enough context that loading it at session start feels meaningfully different from starting fresh. That difference grows every week.
Installing on a Team
If multiple people on your team use AI agents, install MemClaw on each person's setup and share the relevant workspaces.
Each team member:
- Installs MemClaw on their agent (OpenClaw, Claude Code, etc.)
- Sets their own
FELO_API_KEY - Gets invited to shared workspaces by the workspace owner
Once invited, they load the workspace the same way:
Load the Project Alpha workspace
They get the same project context — decisions, status, artifacts — that the workspace owner has been accumulating. No knowledge transfer call needed.
This is particularly useful for:
- Onboarding new team members to an ongoing project
- Handing off a project from one person to another
- Collaborating with contractors who use different agents
Workspace Naming Conventions
MemClaw workspace names are case-insensitive and can contain spaces and special characters. A few conventions that work well:
By client or project name:
Client Alpha, Client Beta, Project Phoenix
By domain:
E-commerce Redesign, Internal HR Tool, Marketing Site
With status prefix (for large teams):
ACTIVE - Client Alpha, ARCHIVED - Old Project, ON HOLD - Beta
Pick a convention and stick to it. Consistent naming makes List all my workspaces more useful as the number of workspaces grows.
Troubleshooting
"MemClaw is not installed" or skill not recognized
Check that the skill files are in the correct directory:
- Claude Code:
~/.claude/skills/memclaw/ - OpenClaw: check your OpenClaw skills directory
Reinstall using Method 1 or Method 4 (manual).
"API key not set" or authentication error
Verify the environment variable is set:
echo $FELO_API_KEY
If it's empty, set it again and make sure you've added it to your shell profile for persistence.
Workspace not found
Workspace names are exact-match. If you created "Client Alpha" and try to load "client alpha", it should still work (case-insensitive). If you're getting "not found", list your workspaces:
List all my workspaces
Slow context restoration
Context restoration typically takes 8 seconds. If it's consistently slower, check your network connection to Felo's API.
MemClaw responds but doesn't seem to know the workspace
This usually means the workspace wasn't loaded before the session started. The agent needs an explicit load command at the start of each session:
Load the [project name] workspace
MemClaw doesn't auto-load workspaces. You need to trigger it manually at session start.
Environment variable set but not persisting between terminal sessions
If you set FELO_API_KEY with export in a terminal session, it only lasts for that session. To make it permanent:
echo 'export FELO_API_KEY="your-api-key-here"' >> ~/.zshrc
source ~/.zshrc
For bash users, replace ~/.zshrc with ~/.bashrc.
Skill installed but commands not recognized after restart
Some agents require a restart to pick up newly installed skills. Close and reopen Claude Code or OpenClaw after installation.
Verifying Everything Works End-to-End
After installation and API key setup, run through this quick verification:
1. Confirm the skill is loaded:
Is MemClaw installed?
Expected: confirmation that MemClaw is available.
2. Create a test workspace:
Create a workspace called Installation Test
Expected: confirmation that the workspace was created.
3. Add something to it:
Add to workspace: this is a test entry
Expected: confirmation that the entry was saved.
4. Load it back:
Load the Installation Test workspace
Expected: agent reads back the workspace including the test entry.
5. Clean up:
Delete the Installation Test workspace
If all five steps work, MemClaw is fully operational. If any step fails, check the troubleshooting section above.
Common Setup Patterns
Solo developer, multiple projects: Create one workspace per project. Load the relevant workspace at the start of each session. Update status at the end. That's the full workflow — no additional configuration needed.
Freelancer with client work: Create one workspace per client. Add client background (contact, stack, constraints, preferences) when you create the workspace. Log decisions as you make them. The workspace becomes your client brief that the agent always has access to.
Team using multiple agents: Each team member installs MemClaw on their own agent setup. Share the workspace with teammates via the invite flow. Everyone loads the same workspace and operates from the same project context — regardless of which agent they're using.
Transitioning from CLAUDE.md: If you've been using a CLAUDE.md file for project context, you can migrate that content into a MemClaw workspace. Load the workspace, then paste your CLAUDE.md content:
Add to workspace: [paste your CLAUDE.md content here]
The workspace will persist this across sessions and across agents, without you needing to maintain the file manually.
What's Next
Once MemClaw is installed and your first workspace is set up:
- Add context as you work — decisions, status updates, artifacts
- Load the workspace at the start of every session
- Create a workspace for each active project
The workspace gets more useful the more you put into it. Start simple and let it grow.